- (912) 673-0001
- 74 Jody Ln, Kingsland, GA 31548, United States

Quicklinks
Our Services
After the Storm: 24-Hour Roof Damage Checklist
- Home
- After the Storm: 24-Hour Roof Damage Checklist
After the Storm: A 24-Hour Roof Damage Checklist (Photos, Tarping, and Next Steps)
When a storm rips through Camden County, your roof takes the hit first. The 24 hours after wind, hail, or driving rain are the most important for safety, documentation, and preventing small problems from turning into major water damage. This step-by-step checklist shows you exactly what to do—what to photograph, how to secure a temporary tarp safely, and how to move through insurance without getting stuck in red tape. If at any point you’re unsure or see active leaking, reach out to our local team for rapid response: Storm Damage Roofing and Roof Repair by Southern Roofers.
0–30 Minutes: Safety First
1) Check people, pets, power.
Confirm everyone’s OK. If power lines are down or sparking, keep away and call your utility. Don’t step on wet surfaces near exposed wiring or metal.
2) Quick exterior scan from the ground.
Walk the property perimeter. Look for shingles on the lawn, bent or missing ridge caps, torn soffit, loose gutters, broken vent caps, cracked skylights, and punctures from limbs. Use binoculars or your phone’s zoom—no ladders yet.
3) Interior water check.
Look at ceilings under the roof planes that faced the wind. Brown rings, sagging drywall, or damp attic insulation mean active intrusion. Place a bucket and a towel stack under any drips and puncture a small hole in a bulging ceiling bubble to drain it safely—better controlled water in a bucket than a collapsed ceiling.
When in doubt, call for help. Our crews prioritize active leaks first: Storm Damage Roofing.
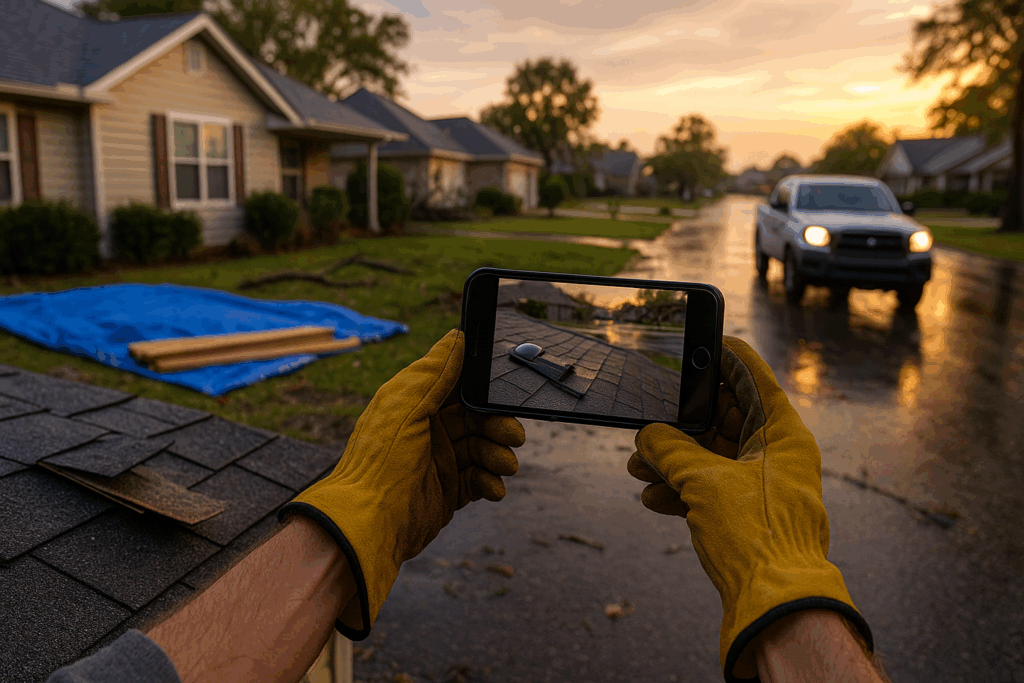
30–90 Minutes: Document Everything (This Helps Claims and Repairs)
Insurance adjusters and roofing pros both rely on clear, time-stamped documentation. Think like a reporter and capture the “who/what/where/when” of your damage.
4) Take wide-to-tight photos:
Wide shots of each elevation (front, back, both sides).
Medium shots of roof lines, valleys, chimneys, skylights, and vents.
Tight close-ups of lifted shingles, nail heads showing, creased tabs, hail impacts on shingles or soft metals (gutters, downspouts, vent hoods), and cracked flashing.
Ground evidence like shingle fragments, granule piles near downspouts, broken tree limbs, and damaged fencing or furniture. Put a coin or tape measure in the frame for scale.
5) Capture weather context.
Note the date and approximate time of the storm, wind direction if you know it, and any alerts you received. A screenshot of the local radar or weather advisory is useful. These details help connect the specific event to the observed damage.
6) Make a quick list.
Bullet points are fine: “South slope—lifted shingles at valley; west gutter loose; water stain above hallway; attic insulation damp near bathroom vent.” This list becomes your scope for both the adjuster and the roofer.
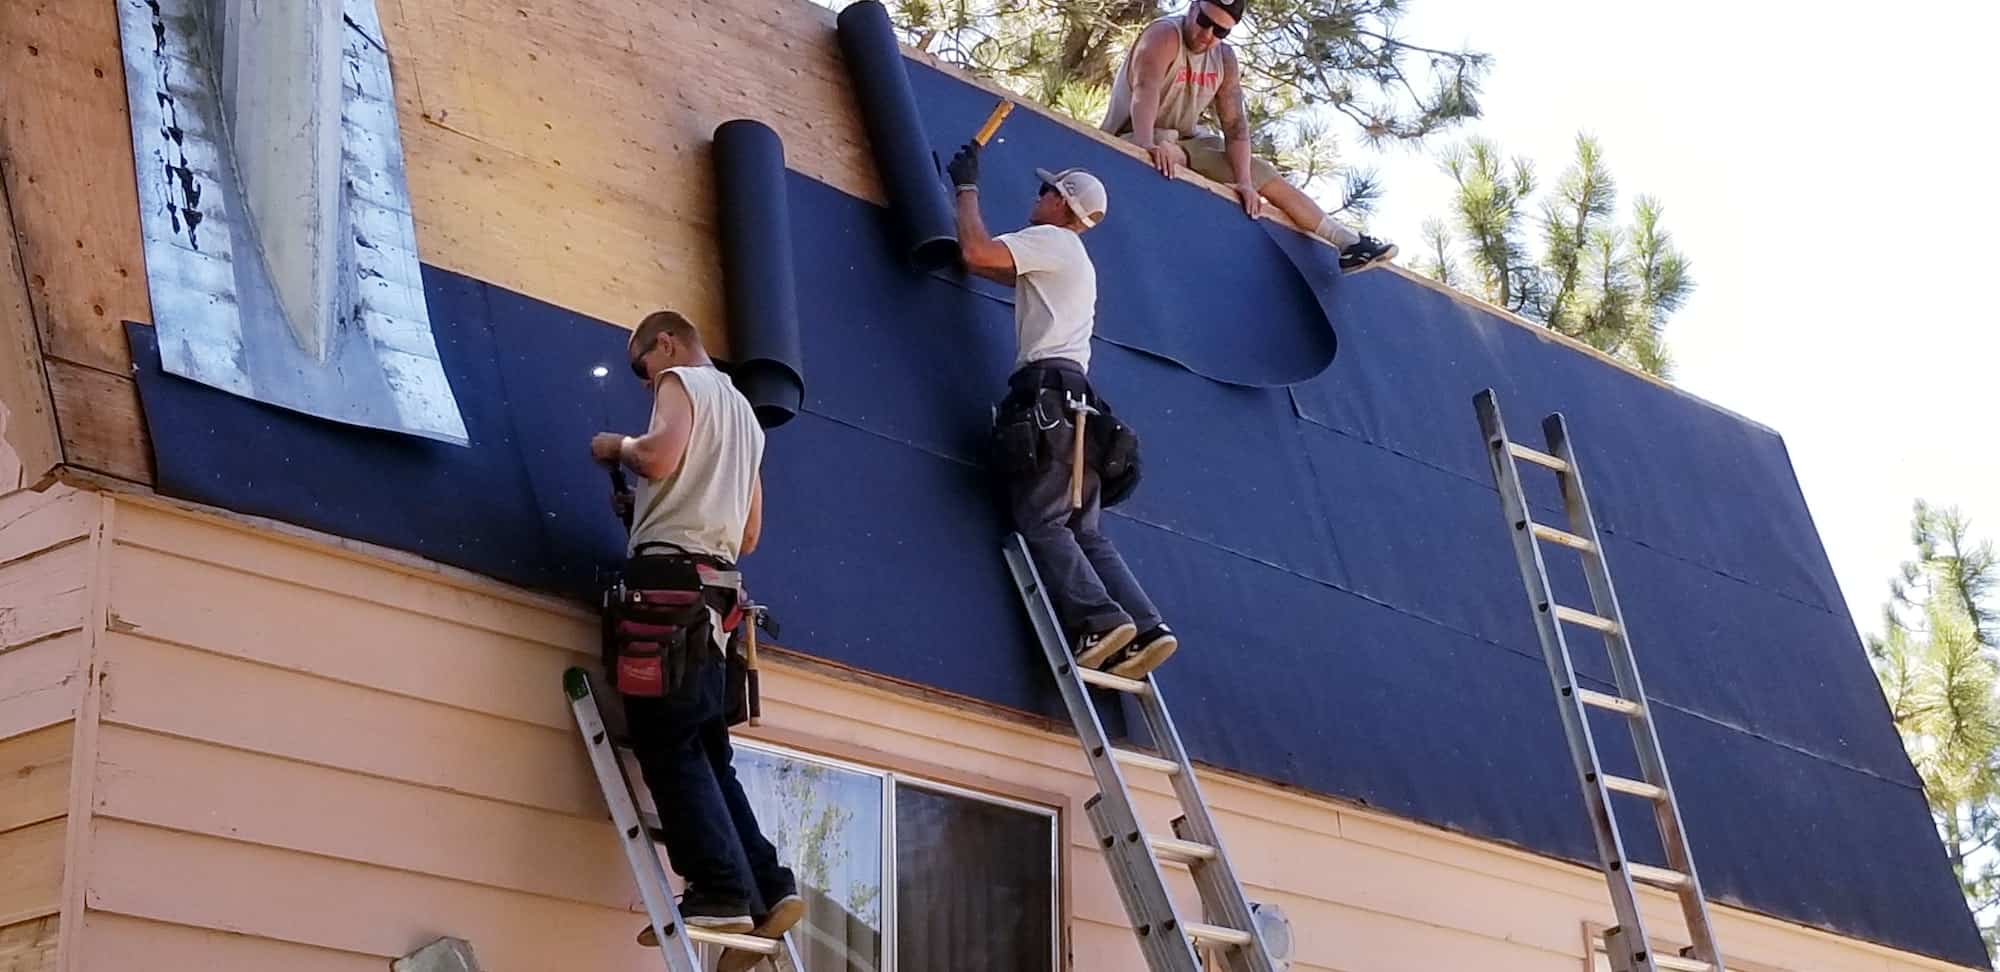
90–180 Minutes: Temporary Tarping (How to Do It Safely)
Tarping is a bridge, not the fix. Do it only if conditions are safe and you’re comfortable on a ladder. Wet roofs are slippery; winds can gust without warning. If the roof is steep, the decking feels spongy, or the damage is near an edge, stop and call Storm Damage Roofing—we’ll secure it for you.
7) Materials to use (and avoid):
Use: 6-mil or heavier tarp, 1×3 or 2×4 furring strips, exterior screws, utility knife, gloves, non-slip shoes.
Avoid: Loose bricks, landscape stones, or anything heavy you might be tempted to “weight down” a tarp. These become projectiles in wind and can worsen damage.
8) How to place a tarp over missing or lifted shingles:
Extend the tarp at least 3–4 feet past the damaged area in all directions, especially upslope so water sheds off the tarp and onto intact shingles.
Roll the upslope edge around a 1×3 furring strip like a burrito and screw that batten through the sheathing above the shingle line, not into the compromised area. This creates a sealed “anchor” that resists wind lift.
Smooth the tarp downslope, keeping it taut. Batten the sides and bottom edge similarly, placing fasteners every 12–18 inches.
Avoid nailing randomly through the field of the tarp into soft decking—you’ll create new leak paths. Use screws through battens at solid structure.
9) Skylights, chimneys, or punctures:
Create a “tent” with the tarp to shed water around protrusions; never caulk over storm cracks as a permanent fix. Sealants are temporary and often mask underlying issues that must be repaired properly.
If you’d rather skip the ladder, call Roof Repair—we can tarp, dry-in with proper underlayment, and plan a permanent fix.
Hours 3–12: Call Your Roofer, Then Your Insurance
Order matters. Adjusters appreciate clear scopes from reputable local contractors, and you’ll avoid getting locked into a quick patch that doesn’t address underlying problems.
10) Get a professional inspection fast.
A qualified roofer will check:
Shingle creases and uplift (often invisible from the ground).
Valley and step flashing, ridge caps, and starter strips.
Decking softness indicating impact or long-term moisture.
Attic side: wet insulation, daylight through decking, improper ventilation that made damage worse.
Soft metals for hail signatures (objective evidence).
We provide written findings with photos and a recommended scope. Start here: Storm Damage Roofing.
11) Notify your insurer with facts in hand.
Provide your documentation and our preliminary findings. Ask for guidance on next steps, whether they want a field adjuster visit, and how to handle emergency mitigation invoices. Keep receipts for tarping, drying fans, and any immediate repairs. Claims often reimburse reasonable mitigation to prevent further damage.
What a Solid Repair (or Replacement) Looks Like Here
Coastal Georgia roofs battle wind-driven rain, salt air, and heat. A quality repair or reroof addresses both the visible damage and the vulnerable details that failed under stress.
12) Repair standards we follow:
Remove to the deck at the damaged area to verify sheathing condition—no “shingle stacking” over compromised layers.
Ice and water membrane in valleys, along eaves as applicable, and around penetrations to resist wind-driven rain.
New flashing at chimneys, walls, and transitions; formed and sealed correctly, not just smeared with mastic.
Ridge and soffit ventilation tuned to the home—balanced intake and exhaust to keep attics dry and cool.
Manufacturer-spec fastener count and placement for wind rating compliance.
Color/lot matching when partial repairs are possible; if matching is not feasible and damage is storm-related, we’ll note that for adjuster consideration.
See how we handle this on real jobs: Roof Repair.
13) When replacement makes more sense:
Widespread shingle uplift or creasing across multiple slopes.
Decking rot, persistent leaks, or repeated patches near valleys and penetrations.
Hail damage that compromises shingle mat integrity across a large area.
You’re nearing end-of-life and want to use the event to upgrade to a better wind-rated assembly.
We’ll price transparent options and timelines, then execute with a clean site and final walkthrough. Start with a Free Estimate.
What Not to Do (Common Post-Storm Mistakes)
Don’t climb a wet, steep, or unstable roof. A slip costs more than any repair.
Don’t hire on a handshake from a door-to-door stranger. Vet licensing, insurance, and local references.
Don’t let anyone create “damage” for the camera. Adjusters spot manufactured damage quickly, and it undermines legitimate claims.
Don’t settle for caulk-only fixes where flashing or membranes failed. Sealant is a Band-Aid, not a system.
Don’t ignore small leaks. Lingering moisture feeds mold, delaminates decking, and ruins insulation—costs climb fast.
Kingsland/Camden County Notes (Local Factors)
Wind-driven rain: Our storms push rain sideways. That’s why valleys, wall intersections, and ridge caps deserve extra scrutiny.
Humidity and heat: Poor ventilation bakes shingles from the underside and slows drying after a storm. We often recommend ridge-and-soffit ventilation upgrades during repairs.
Trees near the roof: Overhanging limbs scuff granules and drop debris that dams water. Trimming back is part of prevention.
Gutters and downspouts: Post-storm granule dumps in gutters are normal, but heavy accumulation plus new shingle creases suggests mat damage.
Frequently Asked Questions
How fast can you get here after I call?
We prioritize active leaks and unsafe conditions first. In many cases we can tarp or dry-in the same day, then return for permanent repairs. Start here: Storm Damage Roofing.
Will insurance cover a full roof?
It depends on the event, policy, and extent of damage. Our role is to document accurately, propose code-compliant repairs or replacement, and communicate clearly with you and your adjuster.
Can I choose an upgraded shingle or even metal?
Yes. If replacement is warranted, we’ll price good-better-best options with clear wind ratings and warranty details so you can decide what fits your home and budget.
What if the roof “looks fine” from the street?
Creased tabs, lifted edges, and flashing failures aren’t always visible from the ground. An attic and close-up inspection often tells the real story.
Your 24-Hour Checklist (Printable Summary)
Confirm safety; avoid downed lines and slick roofs.
Ground-level scan of all sides; check ceilings and attic.
Photograph wide-to-tight, plus gutters and soft metal.
Note storm date/time and wind direction if known.
Tarp safely if you can; otherwise call us.
Book a professional inspection: Storm Damage Roofing.
Notify insurance with photos and findings.
Approve code-compliant repairs or replacement—not just caulk.
Plan ventilation and detail upgrades to prevent repeat issues.
Schedule a post-repair tune-up before the next season.
Ready When You Are
Southern Roofers has served Kingsland, St. Marys, Woodbine, and the rest of Camden County for over 20 years. When storms hit, we move quickly, document thoroughly, and repair the right way—clean sites, straight talk, and results that last. If your roof took a beating last night, let’s stop the leak and set up a plan.
Share on
Recent posts
Small Roof Leak Today, Big Repair Later: What…
Roof Vent Leak vs Shingle Leak: How to…
Projects

Related Posts
Small Roof Leak Today, Big Repair Later: What Happens…
(912) 673-0001 74 Jody Ln, Kingsland, GA 31548, United States Quicklinks Home About Contact Our…
Flashing Problems Around Chimneys and Walls: Signs and Fixes…
(912) 673-0001 74 Jody Ln, Kingsland, GA 31548, United States Quicklinks Home About Contact Our…
Roof Vent Leak vs Shingle Leak: How to Tell…
(912) 673-0001 74 Jody Ln, Kingsland, GA 31548, United States Quicklinks Home About Contact Our…
Your Trustworthy, Trusty Roofing Experts At Southern Roofers. We provide professional roofing to the homes and commercial buildings throughout Kingsland, GA and the surrounding vicinity.
Quick Links
Contact info
- (912) 673-0001
- 74 Jody Ln, Kingsland, GA 31548, United States
© 2025 Southern Roofers. All Rights Reserved.